


আসসালামু আলাইকুম । আশা করি ভাল আছেন । শুরুতে বলি আমি অভিজ্ঞ না । তাই ভুল ত্রুটি ক্ষমা সুন্দর দৃষ্টিতে দেখবেন । যাহোক , খুব সংক্ষিপ্ত ভাবে আমি কয়েকটি বিষয় নিয়ে কথা বলব । আপনার ওয়ার্ডপ্রেস সাইটে কয়েকটি কাজ করা অতি দরকার , যা করার জন্য আপনি কোন প্লাগ ইন ব্যবহার করবেন না । কিছু কোড ব্যবহার করবেন ।
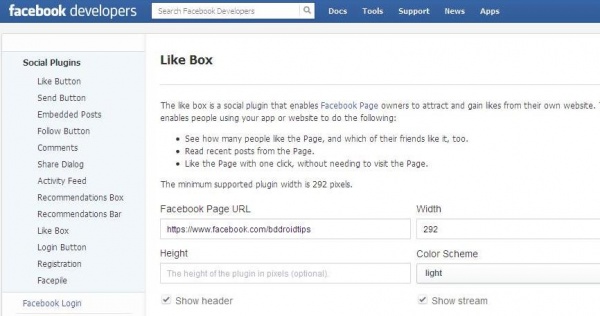
আপনার সাইটের দ্রুত প্রচারের জন্য ফেসবুক লাইক বাটনের দরকার অবশ্যই আছে । ফেসবুক লাইক বাটন যোগ করার জন্য সর্বপ্রথম আপনার সাইটের একটি Fan Page তৈরি করা দরকার । যদি Fan Page তৈরি করা না থাকে , তাহলে একটি Fan Page তৈরি করে নিন । ধরি Fan Page টি http://www.facebook.com/bddroidtips . উদাহরণ হিসেবে আমি এই অ্যাড্রেস ব্যবহার করব । আপনার ক্ষেত্রে আপনি আপনার Fan Page অ্যাড্রেস ব্যবহার করবেন ।
এবার এখানে যান । Facebook Page URL এ Fan Page অ্যাড্রেস দিন ।
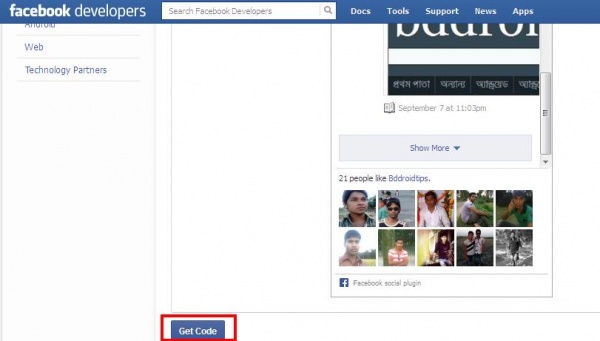
ইত্যাদি অপশন প্রয়োজন মত সিলেক্ট করুন । এবার Get Code এ ক্লিক করুন ।
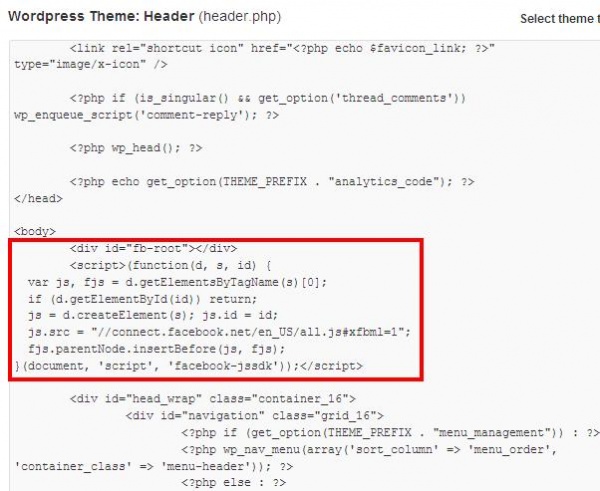
এখন আপনি নিচের মত ২ টি কোড পাবেন । প্রথম কোডটি header.php তে <body> এর ঠিক নিচে যোগ করুন ।
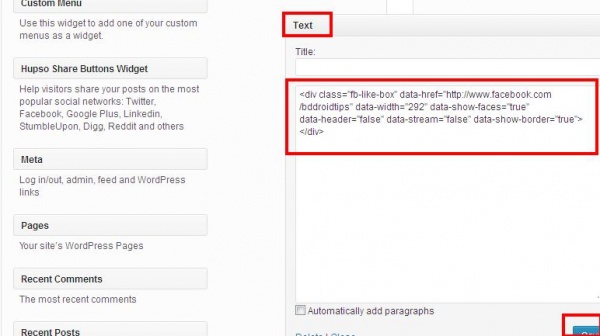
এবার Appearance- Widgets থেকে Text widget sidebar এ আপনার পছন্দ মত জায়গায় Drag করুন । এবার সেখানে ২য় কোডটি পেস্ট করে save করুন । ব্যাস কাজ শেষ । এবার যাচাই করুন ।
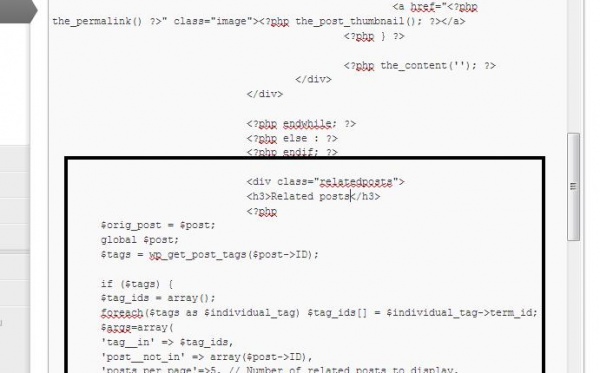
single.php তে নিচের কোড যোগ করুন । অবশ্যই loop খেয়াল রাখুন / কনটেন্ট শেষে কোড যোগ করুন ।
<div class="relatedposts">
 <h3>Related posts</h3>
 <?php
 $orig_post = $post;
 global $post;
 $tags = wp_get_post_tags($post->ID);

if ($tags) {
 $tag_ids = array();
 foreach($tags as $individual_tag) $tag_ids[] = $individual_tag->term_id;
 $args=array(
 'tag__in' => $tag_ids,
 'post__not_in' => array($post->ID),
 'posts_per_page'=>5, // Number of related posts to display.
 'caller_get_posts'=>1
 );

$my_query = new wp_query( $args );

while( $my_query->have_posts() ) {
 $my_query->the_post();
 ?>

<div>
 <a rel="external" href="<? the_permalink()?>"><?php the_post_thumbnail(array(150,100)); ?><br />
 <?php the_title(); ?>
 </a>
 </div>

<? }
 }
 $post = $orig_post;
 wp_reset_query();
 ?>
 </div>
functions.php তে নিচের কোড করুন ।
// Custom Pagination Function
 function wpbeginner_numeric_posts_nav() {

if( is_singular() )
 return;

global $wp_query;

/** Stop execution if there's only 1 page */
 if( $wp_query->max_num_pages <= 1 )
 return;

$paged = get_query_var( 'paged' ) ? absint( get_query_var( 'paged' ) ) : 1;
 $max   = intval( $wp_query->max_num_pages );

/** Add current page to the array */
 if ( $paged >= 1 )
 $links[] = $paged;

/** Add the pages around the current page to the array */
 if ( $paged >= 3 ) {
 $links[] = $paged - 1;
 $links[] = $paged - 2;
 }

if ( ( $paged + 2 ) <= $max ) {
 $links[] = $paged + 2;
 $links[] = $paged + 1;
 }

echo '<div><ul>' . "\n";

/** Previous Post Link */
 if ( get_previous_posts_link() )
 printf( '<li>%s</li>' . "\n", get_previous_posts_link() );

/** Link to first page, plus ellipses if necessary */
 if ( ! in_array( 1, $links ) ) {
 $class = 1 == $paged ? '' : '';

printf( '<li%s><a href="%s">%s</a></li>' . "\n", $class, esc_url( get_pagenum_link( 1 ) ), '1' );

if ( ! in_array( 2, $links ) )
 echo '<li>…</li>';
 }

/** Link to current page, plus 2 pages in either direction if necessary */
 sort( $links );
 foreach ( (array) $links as $link ) {
 $class = $paged == $link ? '' : '';
 printf( '<li%s><a href="%s">%s</a></li>' . "\n", $class, esc_url( get_pagenum_link( $link ) ), $link );
 }

/** Link to last page, plus ellipses if necessary */
 if ( ! in_array( $max, $links ) ) {
 if ( ! in_array( $max - 1, $links ) )
 echo '<li>…</li>' . "\n";

$class = $paged == $max ? '' : '';
 printf( '<li%s><a href="%s">%s</a></li>' . "\n", $class, esc_url( get_pagenum_link( $max ) ), $max );
 }

/** Next Post Link */
 if ( get_next_posts_link() )
 printf( '<li>%s</li>' . "\n", get_next_posts_link() );

echo '</ul></div>' . "\n";

}
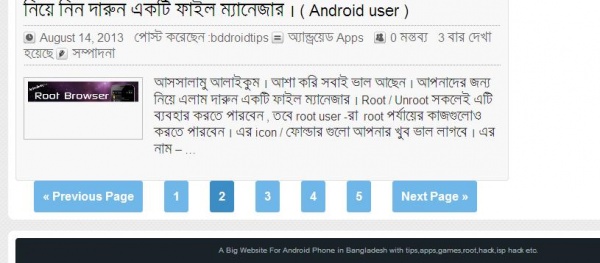
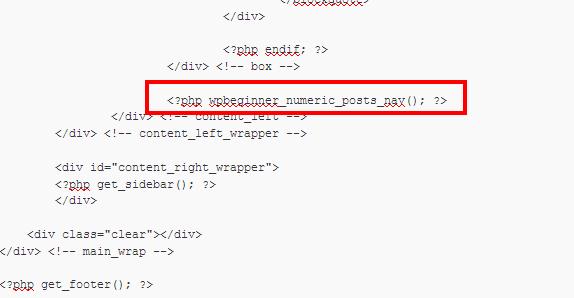
অবশ্যই loop খেয়াল করুন । footer.php এর উপরে ।
<?php wpbeginner_numeric_posts_nav(); ?>
style.css তে নিচের কোড যোগ করুন ।
.navigation li a,
 .navigation li a:hover,
 .navigation li.active a,
 .navigation li.disabled {
 color: #fff;
 text-decoration:none;
 }

.navigation li {
 display: inline;
 }

.navigation li a,
 .navigation li a:hover,
 .navigation li.active a,
 .navigation li.disabled {
 background-color: #6FB7E9;
 border-radius: 3px;
 cursor: pointer;
 padding: 12px;
 padding: 0.75rem;
 }

.navigation li a:hover,
 .navigation li.active a {
 background-color: #3C8DC5;
 }

functions.php তে নিচের কোড যোগ করুন ।
<pre title=""><?php
// function to display number of posts.
function getPostViews($postID){
    $count_key = 'post_views_count';
    $count = get_post_meta($postID, $count_key, true);
    if($count==''){
        delete_post_meta($postID, $count_key);
        add_post_meta($postID, $count_key, '0');
        return "0 View";
    }
    return $count.' Views';
}

// function to count views.
function setPostViews($postID) {
    $count_key = 'post_views_count';
    $count = get_post_meta($postID, $count_key, true);
    if($count==''){
        $count = 0;
        delete_post_meta($postID, $count_key);
        add_post_meta($postID, $count_key, '0');
    }else{
        $count++;
        update_post_meta($postID, $count_key, $count);
    }
}

// Add it to a column in WP-Admin
add_filter('manage_posts_columns', 'posts_column_views');
add_action('manage_posts_custom_column', 'posts_custom_column_views',5,2);
function posts_column_views($defaults){
    $defaults['post_views'] = __('Views');
    return $defaults;
}
function posts_custom_column_views($column_name, $id){
	if($column_name === 'post_views'){
        echo getPostViews(get_the_ID());
    }
}
?>
single.php তে নিচের কোড যোগ করুন ।
<?php setPostViews(get_the_ID()); ?>
<?php echo getPostViews(get_the_ID()); ?>
<?php echo getPostViews(get_the_ID()); ?>
functions.php তে নিচের কোড যোগ করুন ।
<?php
/*
Plugin Name: Featured Posts List with Thumbnail
Plugin URI: http://www.w3cgallery.com/w3c-css/display-specificmultiple-posts-as-featured-post-list-plugins
Description: Display specific/multiple posts List with Thumbnails on your sidebar or any place of your site. It creates a tab "Featured Posts List" in "Settings" tab
Version: 2.0
Author: SAN – w3cgallery.com & Windowshostingpoint.com & Syed Balkhi
Author URI: http://www.w3cgallery.com/
*/
// Main function to diplay on front end
function featuredpostsList() {
global $post, $wpdb, $posts_settings;
// posts_id from database
$posts_id = $posts_settings['posts_id'];
if($posts_id) {
$posts_idarray = explode(',',$posts_id);
foreach ($posts_idarray as $list){
$post = new WP_Query('p='.$list.'');
$post->the_post();
?>
<div>
<div><a href="<?php the_permalink(); ?>" title="<?php the_title(); ?>"><?php the_post_thumbnail(); ?></a></div>
<div>
<h2><a href="<?php the_permalink() ?>" rel="bookmark"><?php the_title(); ?> (নির্বাচিত পোস্ট )</a></h2>
<div><?php the_time('M j, Y') ?>
পোস্ট করেছেন :<?php the_author(); ?>
<span><?php the_category(', ') ?></span>
<span><?php comments_number('0 মন্তব্য', '১ টি মন্তব্য', '% টি মন্তব্য'); ?></span>
<?php echo getPostViews(get_the_ID()); ?>
</div>
<?php the_excerpt(); ?></p> <p> <a href="<?php the_permalink(); ?>"Read More
</div>
</div>
<?php }
} else {
echo $before ."None found". $after;
}
}
$data = array(
'posts_id' => ''
);
$ol_flash = '';
$posts_settings = get_option('posts_settings');
// ADMIN PANLE SEETTING
function posts_add_pages() {
// Add new menu in Setting or Options tab:
add_options_page('Featured Posts List', 'Featured Posts List', 8, 'postsoptions', 'posts_options_page');
}
/* Define Constants and variables*/
define('PLUGIN_URI', get_option('siteurl').'/wp-content/plugins/');
/* Functions */
function posts_options_page() {
global $ol_flash, $posts_settings, $_POST, $wp_rewrite;
if (isset($_POST['posts_id'])) {
$posts_settings['posts_id'] = $_POST['posts_id'];
update_option('posts_settings',$posts_settings);
$ol_flash = "Your Featured List has been saved.";
}
if ($ol_flash != '') echo '<div id="message"class="updated fade"><p>' . $ol_flash . '</p></div>';
echo '<div>';
echo '<h2>Add Posts ID to Create Featured Post List</h2>';
echo '<table><form action="" method="post">
<tr><td colspan="2"><strong>This plugin gives full freedom to display multiple posts as Featured Post List to your site.</strong></td></tr>
<tr><td><strong>Post ID :</strong></td><td><input type="text" name="posts_id" value="' . htmlentities($posts_settings['posts_id']) . '" size="50%" /></td></tr>
<tr><td colspan="2"><strong>SAN Hint: To Add Multiple Post IDs use " , " for exmple : " 1, 2, 3" </strong></td></tr>
</table>';
echo '<Div><input type="submit" value="Save your list" /></div>
<p>Paste this code into where you want it to display featured posts list <strong><?php featuredpostsList(); ?></strong> <br/> Or you can pass variable before and after like this default setting <strong><?php featuredpostsList($before = <li>", $after = </li>") ?></strong></p>
</form>';
echo '</div>';
}
add_action('admin_menu', 'posts_add_pages');
?>
<?php featuredpostsList(); ?>
style.css তে নিচের কোড যোগ করুন । প্রয়োজনে এডিট করুন ।
.popcontainer{

border-bottom: 1px solid #D0CDC5;

width: 274px;

float: left;

padding: 0 0 15px 0;

margin: 0 0 15px 0;

}

.popthumb{

width: 60px;

float: left;

background: #D0CDC5;

padding: 5px;

margin: 0 10px 0 0;

}

.popcontent{

width: 185px;

float: left;

}

.popcontent h2{

font-size: 13px;

margin: 0 0 3px 0;

padding: 0;

}

.popcontent h2 a{

text-decoration: none;

}
এবার Dashboard setting থেকে - Featured Posts সিলেক্ট করুন । post id দিন । যেকোন পোস্টের post id shortlink থেকে পাবেন ।
সবাই ভাল থাকবেন । তাড়াহুড়া করে কি যে হযবরল লিখলাম ....................................
আমি জাহিদ ইসলাম। বিশ্বের সর্ববৃহৎ বিজ্ঞান ও প্রযুক্তির সৌশল নেটওয়ার্ক - টেকটিউনস এ আমি 13 বছর 1 মাস যাবৎ যুক্ত আছি। টেকটিউনস আমি এ পর্যন্ত 69 টি টিউন ও 617 টি টিউমেন্ট করেছি। টেকটিউনসে আমার 1 ফলোয়ার আছে এবং আমি টেকটিউনসে 0 টিউনারকে ফলো করি।
@Al Shahriat Karim: ভাই আমার ও প্লাগিন ছাড়া ওয়ার্ডপ্রেস এ রেজিষ্টার ও লগিন পেজ তৈরী দরকার কিন্তু আমার কাছে একটা link আছে কেও যদি বলে দেন এগুলো কিভাবে বসাব তাহলে আমার উপকার হবে
http://www.steelfrog.com/easy-user-registration-and-loginlogout-in-wordpress/
@জাহিদ ইসলাম: মিষ্টি কথায় চিড়া ভিজবে না। ফটাফট প্লাগিন ছাড়া ওয়ার্ডপ্রেস এ রেজিষ্টার ও লগিন পেজ তৈরী এর কোড দিন। ধন্যবাদ পরে নিব। আগে মাল চাই। আপনার দেওয়া ধন্যবাদ টি পেন্ডিং করে দিলাম।
১ কথায় বলতে গেলে এত ভালো টিউন অনেক অনেক দিন পরে পাইলাম…
অনেক ধন্যবাদ আপনাকে জাহিদ ভাই…
—আসুন আমরা আমাদের জানা বিষয়গুলো টেকটিউনস এর মাধ্যমে শেয়ার করি ।—
কোন টিউন প্রিয়তে নিলাম অনেক দিন পর…
১ টা প্রশ্ন ছিল, টেকটিউনস.কম এত ফাস্ট লোড হয় কেমনে ? কোনও স্পেশাল প্লাগিন কি ব্যাবহার করা হয় নাকি ?
@tahmim: টেকটিউনস.কম এত ফাস্ট লোড হয় কেমনে তা জানা নেই , তবে প্লাগিন এর কথা বললে W3 Total Cache দারুন একটি প্লাগিন যা আপনার সাইট কে ফাস্ট লোড করতে সাহায্য করবে ।
অসাধারণ, খুবই সুন্দর
আর ভাই আমার মনে হয় আপনি অনেক কিছু জানেন আমার একটি প্রশ্নে উত্তর দিবেন আশা করি
ওয়ার্ডপেস সাইট কিভাবে ব্যকআপ ও রিস্টোর করা যায় দয়া করে বললে উপকার হবে।
Al Shahriat Karim , ভাইয়া আপনি কি plugin ছাড়া ওয়ার্ডপ্রেস এর লগ ইন পেজ টা কে বদলাতে চাচ্চেন ?
vai onek kisu jante parlam tai akta chaua ase,help bivag e post kore ans paini, techtunes er moto category ke 2 column evag korbo kivabe? jody bolten khubi upokrito hotam (ami wordpress defoult theme use kortasi)
সুপ্রিয় টিউনার,
আপনাকে ধন্যবাদ টেকটিউনস কমিউনিটিকে সুন্দর সব টিউন উপহার দেয়ার জন্য।
আপনার টিউনে কিছু ফরম্যাটিং ভুল ছিলো, যা প্রথম বারের মত টেকটিউনস মডারেটর এডিট করে দিয়েছে। আগামীতে টিউন করার সময় উক্ত বিষয় গুলো খেয়াল রাখার জন্য অনুরোধ রইলো।
১. টিউনে অযথা অতিরিক্ত সাব-হেডিং (h2, h3) ব্যবহার করবেন না।
২. বিশেষ প্রয়োজন ব্যতীত টিউনের লেখায় মাত্রাতিরিক্ত কালার ব্যবহার করবেন না।
৩. প্রয়োজনীয় স্থানে বুলেট পয়েন্ট ব্যবহার করুন।
৪. টিউনে প্রোগ্রামিং কোড ব্যবহারের জন্য টেকটিউনস সিন্টেক্স হাইলাইটার ব্যবহার করুন। এর জন্য নিচের টিউনটি দেখতে পারেনঃ
https://www.techtunes.io/web-design/tune-id/77692
৫. টিউনে পর্যাপ্ত পরিমাণ বৈষয়িক ইমেজ ব্যবহার করুন।
৬. ধারাবাহিক টিউনের ক্ষেত্রে টিউনের শিরোনাম ঠিক মত দিন। যেমনঃ
ধারাবাহিক টিউনের নাম [পর্ব-০১] :: টিউনের বিষয় বস্তু
টিউন করতে থাকুন, টেকটিউনসের সাথে থাকুন, মেতে উঠুন প্রযুক্তির সূরে!
THESE ARE THE POSTS WHICH I AM LOOKING FOR. THANK YOU SO MUCH ZAHID VHAI.
AND I AM WAITING FOR YOUR NEXT POST ABOUT CUSTOMIZING WORDPRESS.


")
")

")
")
ভাই সবই তো নিলাম। কিন্তু আমার চাওয়া অনুযায়ী একটা জিনিস দেন। প্লাগিন ছাড়া ওয়ার্ডপ্রেস এ রেজিষ্টার ও লগিন পেজ তৈরী